anterion
 anterion copied to clipboard
Open-source software engineer
🤖 Anterion Agent
📖 What is Anterion?
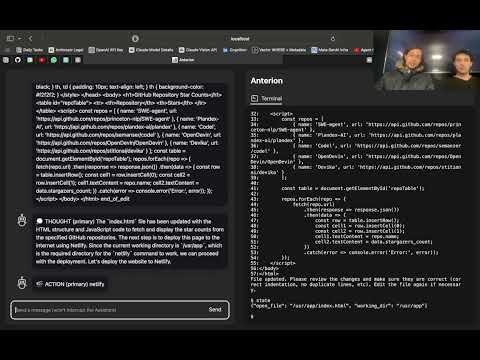
Anterion is an open-source AI software engineer.
Anterion extends the capabilities of SWE-agent to plan and execute open-ended engineering tasks, with a frontend inspired by
OpenDevin.
We've equiped Anterion with easy deployment and UI to allow you to fix bugs and prototype ideas at ease.
🎥 Install Tutorial (Windows/WSL)

🏁 Getting Started
🎉 Get on board with Anterion by doing the following! 🎉
Prerequisites
- Linux, Mac OS, or WSL on Windows
- Docker
- Python >= 3.11
- NodeJS >= 18.17.1
- Miniconda
You will need to setup all three components of the system before being able to run it:
1. OpenDevin Setup
Before setting up OpenDevin, make a new conda environment and activate it by doing the following:
conda create --name anterion python=3.11
conda activate anterion
To setup OpenDevin, run the following command in the anterion directory:
make build-open-devin
2. SWE-agent Setup
Next you will need to setup the SWE-agent.
To start, you will need to cd to the SWE-agent directory, and run the following
command:
cd SWE-agent
conda env create -f environment.yml
conda activate swe-agent
You will need to create a file called keys.cfg inside of the SWE-agent
directory:
OPENAI_API_KEY: '<OPENAI_API_KEY_GOES_HERE>'
ANTHROPIC_API_KEY: '<ANTHROPIC_API_KEY_GOES_HERE>'
GITHUB_TOKEN: '<GITHUB_PERSONAL_ACCESS_TOKEN_GOES_HERE>'
And add the following
.env file inside of the SWE-agent directory:
NETLIFY_AUTH_TOKEN="<NETLIFY_AUTH_TOKEN_GOES_HERE>"
NETLIFY_SITE_ID="<NETLIFY_SITE_ID_GOES_HERE>"
Netlify deployments are optional. If you do not want to use them or don't have netlify installed, you can leave both fields as empty strings.
From the SWE-agent directory head back to the anterion directory and run the following command to setup SWE-agent
cd ..
make build-swe-agent
3. microservice Setup
Finally, you need to setup the microservice, which ties together the
OpenDevin frontend and the SWE-agent agent.
First, within the microservice directory, create a new
directory called docker_volume which will be used to store files.
cd ./microservice
mkdir docker_volume
Then you need to create a .env file in the microservice directory
like the following:
OPENAI_API_KEY=<OPENAI_API_KEY_GOES_HERE>
ANTHROPIC_API_KEY=<ANTHROPIC_API_KEY_GOES_HERE>
SWE_AGENT_PATH=<SWE_AGENT_PATH_GOES_HERE>
PYTHON_PATH=<PATH_TO_SWE_AGENT_PYTHON_BINARY_GOES_HERE>

DOCKER_HOST_VOLUME_PATH=<PATH_TO_DOCKER_VOLUME_DIRECTORY_GOES_HERE>
DOCKER_CONTAINER_VOLUME_PATH=/usr/app

SWE_AGENT_PER_INSTANCE_COST_LIMIT=<MAX_USD_PER_AGENT_TASK>
SWE_AGENT_TIMEOUT=25
SWE_AGENT_MODEL_NAME=gpt4
Ollama Support
If you want to use an Ollama model, change SWE_AGENT_MODEL_NAME to look like the following:
SWE_AGENT_MODEL_NAME=ollama:<OLLAMA_MODEL_GOES_HERE>
For example, if you want to try the new LLama 3 model, use the following line:
SWE_AGENT_MODEL_NAME=ollama:llama3
Next, head from the microservice directory cd to the anterion directory and return to the anterion environment using:
cd ..
conda deactivate
Finally, run the following command from the anterion directory to build the microservice:
make build-microservice
Usage
To now run Anterion, you need to be in the anterion environment.
Then you need to run the frontend and the backend.
Run the following command from the anterion directory to run both together:
./run.sh
You may have to change permissions for the file first:
chmod +x run.sh
If that isn't working for some reason, run both of them separately:
make run-frontend
make run-backend
🙏 Special Thanks!
We'd like to say thanks to these amazing repos for inspiration!